Author: The New Camera

  • What is ISO in Photography

    What is ISO in Photography

    In photography, ISO refers to the sensitivity of a camera’s image sensor. The higher the ISO number, the more sensitive the sensor is to light, which allows for faster shutter speeds and/or lower f-stop numbers (wider aperture) in low-light conditions. However, increasing the ISO can also introduce noise or graininess into the image. ISO values typically range from 100 to 6400, with some cameras going as high as 25600. Some cameras also have an option called “Auto ISO” which automatically adjust the ISO based on the lighting conditions.

    Table of Contents

      The Begining of ISO in Photography

      ASA and DIN were two different standards used to measure the sensitivity of film cameras. ASA (American Standards Association) was primarily used in the US, while DIN (Deutsche Industrie Norm) was used primarily in Europe. In 1974, these two standards were combined into the ISO (International Organization for Standardization) standard, which is now used worldwide. This standard was later revised to include both film and digital photography. The term “ISO” now refers to the sensitivity of the camera sensor, and it is one of the most important settings in photography as it determines how much light the camera’s sensor needs to capture an image. It’s one of the three pillars of the exposure triangle, alongside shutter speed and aperture, that work together to control the amount of light entering the camera.

      The Three Pillers of Photography

      As an expert in photography, I would explain ISO as one of the three pillars of the exposure triangle, along with aperture and shutter speed. These three elements work together to control the amount of light that enters the camera and reaches the image sensor.

      1. ISO: ISO refers to the sensitivity of the camera’s image sensor. It controls how sensitive the sensor is to light, with higher ISO values indicating greater sensitivity. This allows for faster shutter speeds and/or lower f-stop numbers (wider aperture) in low-light conditions. However, increasing the ISO can also introduce noise or graininess into the image.
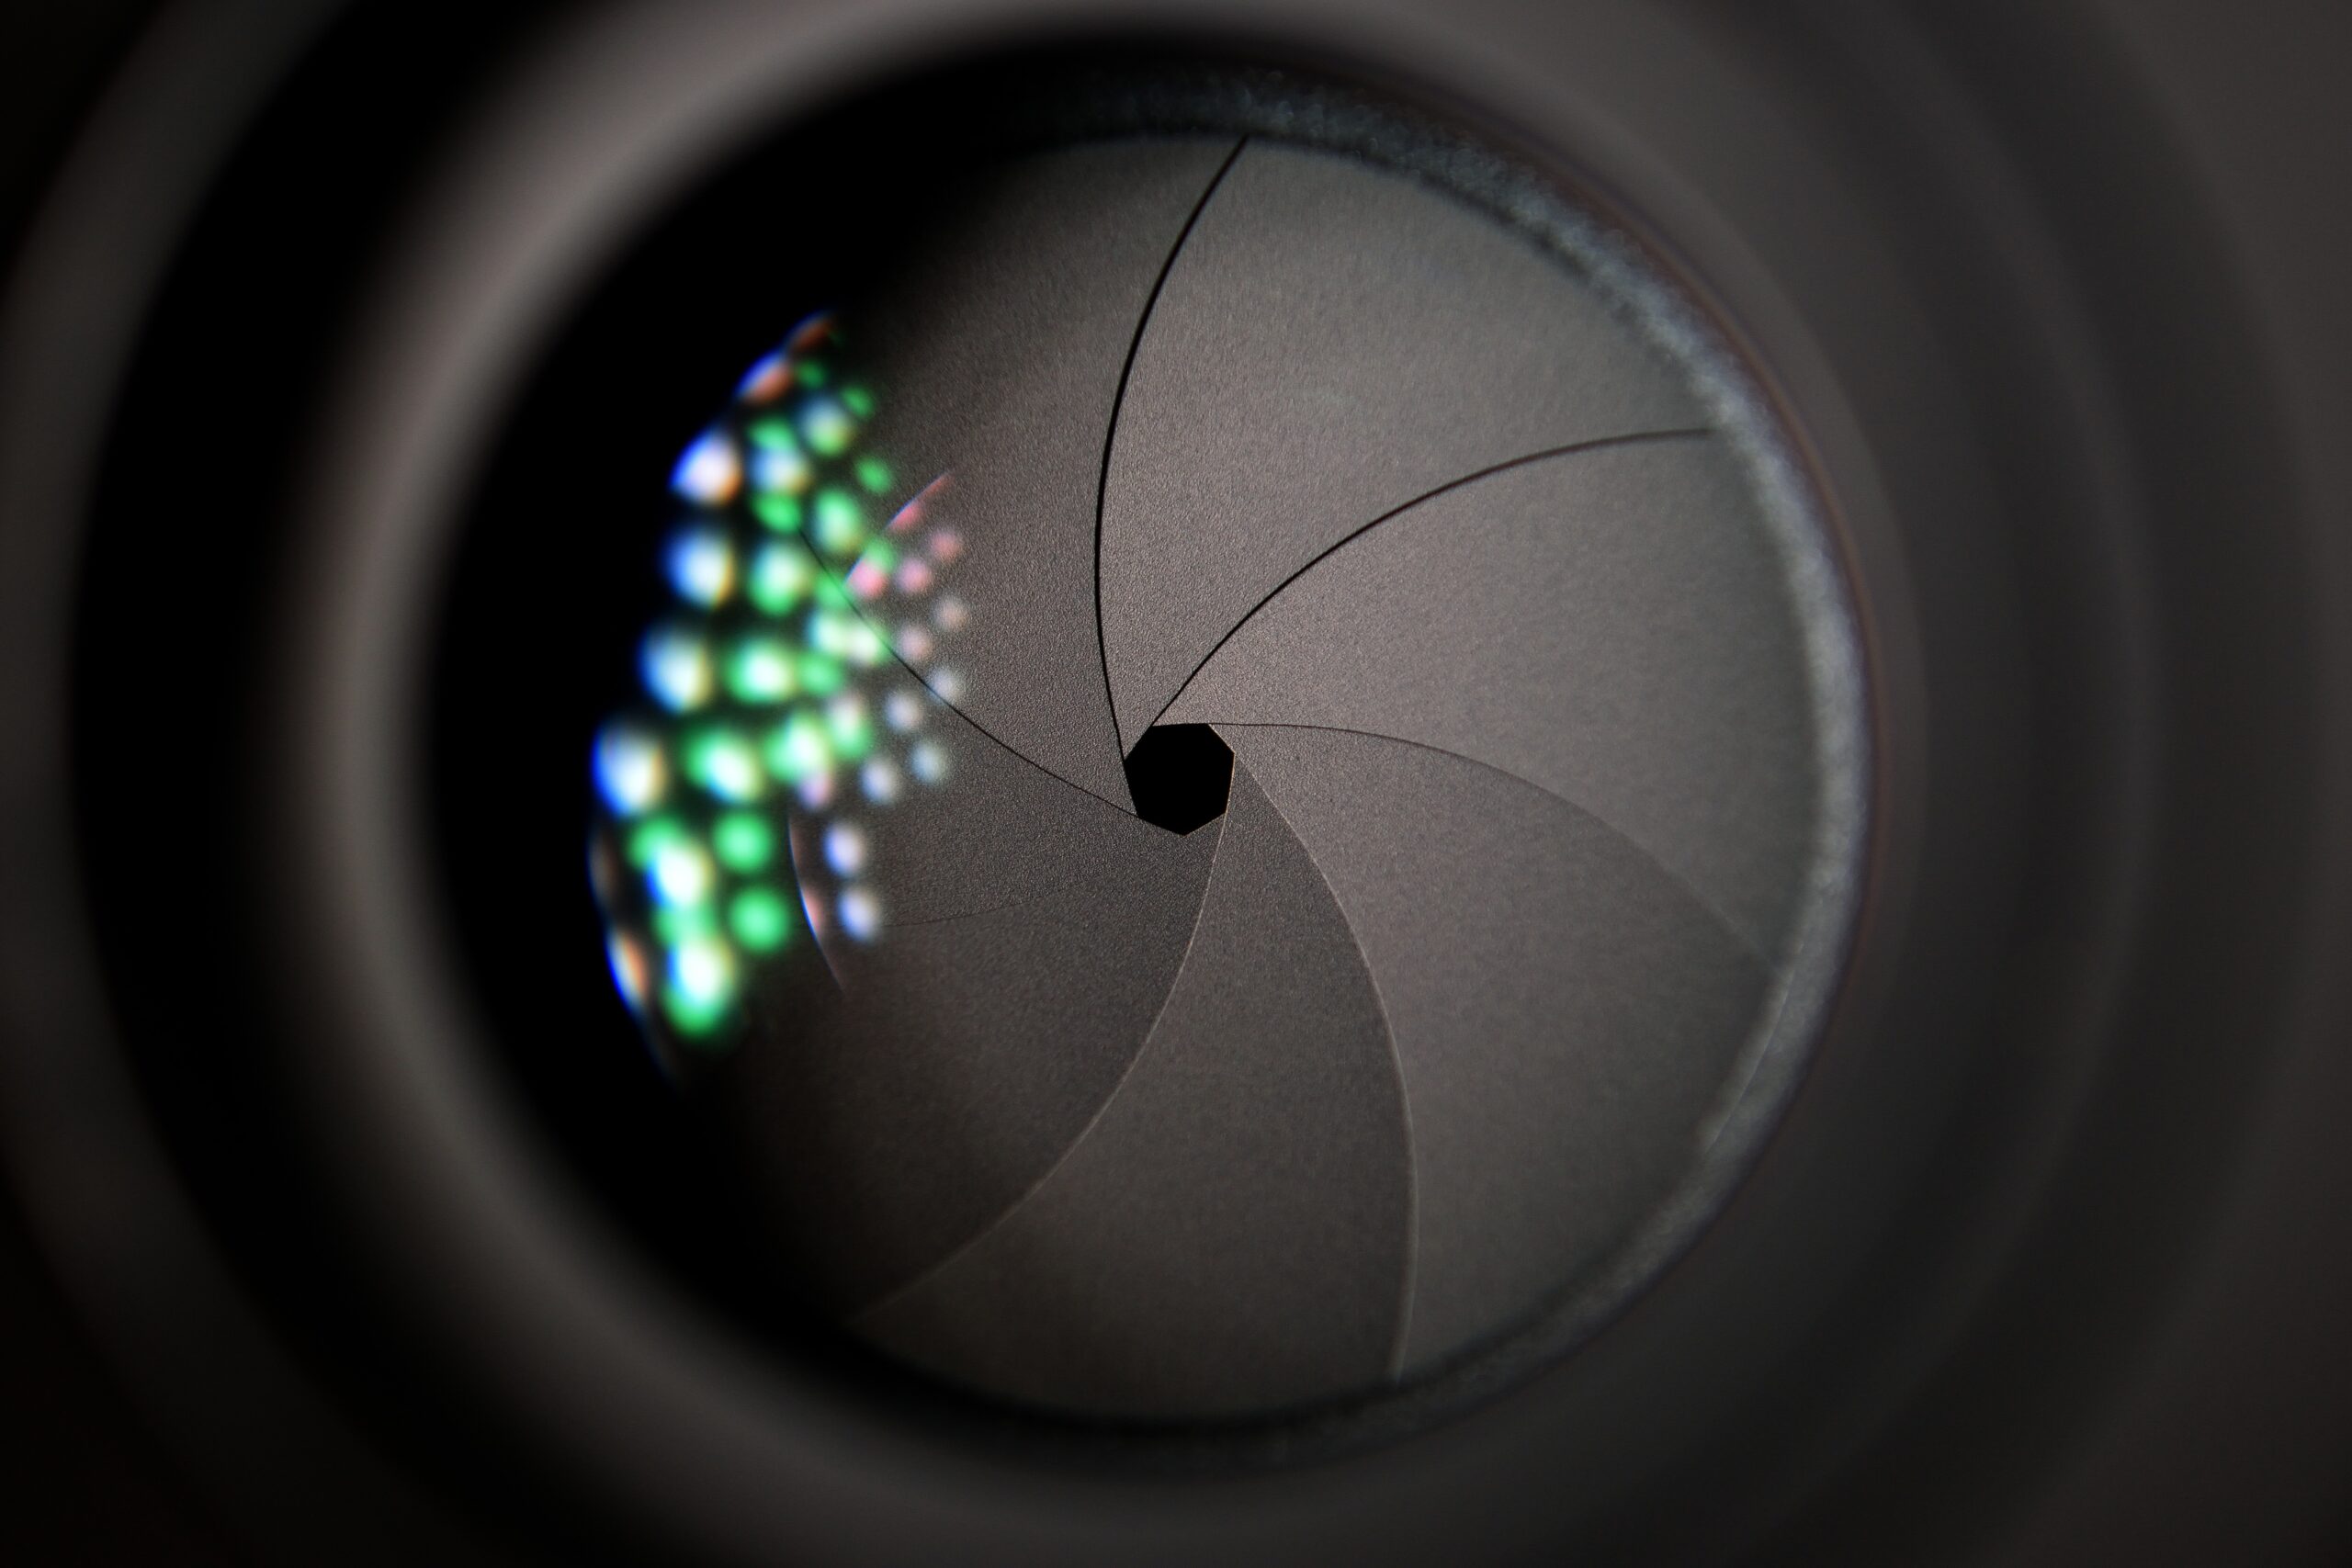
      2. Aperture: Aperture refers to the size of the lens opening, measured in f-stop values. A lower f-stop number indicates a wider aperture, which allows more light to enter the camera. A wider aperture also creates a shallower depth of field, which can be used to isolate a subject from its background.
      3. Shutter speed: Shutter speed refers to the amount of time that the camera’s shutter remains open, measured in seconds or fractions of a second. A faster shutter speed allows for freezing fast-moving action or reducing motion blur, while a slower shutter speed allows for intentionally blurring motion or creating a sense of movement.

      By adjusting these three pillars of the exposure triangle, a photographer can achieve the desired exposure in any lighting condition.

      How is ISO in a Camera Measured?

      In a digital camera, ISO is measured in stops. A “stop” is a term used to describe a doubling or halving of the amount of light reaching the sensor. Each time the ISO is increased by one stop, the sensor becomes twice as sensitive to light. Conversely, each time the ISO is decreased by one stop, the sensor becomes half as sensitive to light.

      It’s important to note that as you increase the ISO in stop increments, you’ll also increase the noise in the image. Therefore, it’s a good practice to use the lowest ISO possible for the given lighting conditions to avoid noise.

      Hi and Lo ISO Setting in Camera

      In photography, the terms “HI” and “LO” are often used to refer to the upper and lower limits of a camera’s ISO range, respectively.

      “HI” value for ISO in camera refers to the highest ISO setting that a camera can achieve. This value represents the highest level of sensitivity that the camera’s sensor can achieve, and it is typically used in very low-light situations where other options such as flash or a tripod are not available. High ISO values tend to produce more noise, so it’s recommended to use the lowest ISO possible for the given lighting conditions to avoid noise.

      “LO” value for ISO in camera refers to the lowest ISO setting that a camera can achieve. This value represents the lowest level of sensitivity that the camera’s sensor can achieve, and it is typically used in well-lit environments or when a tripod or other stabilizing device is used. Low ISO values tend to produce less noise and better image quality, so it’s recommended to use the lowest ISO possible for the given lighting conditions to maintain image quality.

      It’s important to note that every camera has different capabilities, so the HI and LO values for ISO can vary. A full-frame camera might have ISO range of 50-102400, while an APS-C camera might have a range of 100-51200 (native 100 – 6400).

      ISO stops in a camera refer to the incremental changes in the sensitivity of the camera’s sensor to light. Each stop represents a doubling or halving of the amount of light reaching the sensor. The standard ISO range for digital cameras is typically 100-6400, with some cameras going up to 12800 or even higher. Here is an explanation of some common ISO stops:

      • ISO 100: This is the base ISO, also known as the “native” or “minimum” ISO. At this setting, the sensor is at its least sensitive to light, and it requires the most light to produce a correct exposure. This setting is recommended for use in well-lit environments and produces the least amount of noise in the image.
      • ISO 200: This setting doubles the sensor’s sensitivity to light compared to ISO 100. This setting is still suitable for well-lit environments, but it can also be used in slightly dimmer conditions.
      • ISO 400: Again 2X sensitivity to light compared to ISO 200. This setting can be used in lower-light situations, such as indoor or overcast outdoor environments. The noise in the image becomes visible at this level of ISO.
      • ISO 800: Doubles the sensor’s sensitivity to light compared to ISO 400. This setting is useful in dimly lit environments, such as indoor events or night photography. The noise in the image becomes more visible at this level of ISO.
      • ISO 1600: Now, again 2X sensitivity to light compared to ISO 800. This setting can be used in very low-light situations, such as in poorly lit indoor environments or in very dark outdoor environments. The noise in the image becomes more apparent at this level of ISO.
      • ISO 3200: 1600 X 2 = 3200. This setting is useful in extremely low-light situations, such as in extremely dark indoor environments or in very dark outdoor environments. The noise in the image becomes very apparent at this level of ISO.
      • ISO 6400: This setting doubles the sensor’s sensitivity to light compared to ISO 3200. This setting is used in extremely low-light situations where no other options are available. The noise in the image becomes very strong at this level of ISO.

      Major Disadvantage of using High ISO

      As the ISO value of a camera is increased, the sensor becomes more sensitive to light and requires less light to produce a correct exposure. However, this increased sensitivity also comes with some drawbacks, the most notable of which is the loss of image quality due to increased noise and loss of detail.

      One of the main ways that details are lost when raising the ISO is through the introduction of “noise” into the image. Noise is an unwanted byproduct of the sensor’s increased amplification, and it appears as tiny specks of color or graininess in the image. As the ISO is increased, the noise level in the image also increases, and at higher ISO values, the noise can become quite pronounced and can make the image look “grainy” and less sharp.

      Another way that details are lost when raising the ISO is through the loss of “dynamic range”. Dynamic range refers to the range of brightness levels that a camera can capture in a single image. As the ISO is increased, the sensor’s ability to capture a wide range of brightness levels is reduced, and details in the highlights and shadows of the image can be lost.

      Color noise is another problem that can occur when raising the ISO. Color noise appears as random pixels of different colors scattered throughout the image. This happens because the sensor’s increased amplification also amplifies the color information, making it more visible. This can make the image look less natural and less pleasant to the eye.

      An example of how details are being lost when raising the ISO, imagine you are taking a picture of a person in a dimly lit room. If you use a low ISO such as 100 or 200, you’ll have a well-exposed picture with no noise and good details. But if you use a higher ISO such as 800 or 1600, the picture will be well-exposed but you’ll start seeing some noise and loss of details, particularly in the darker areas of the image.

      To maintain image quality, it’s recommended to keep the ISO as low as possible.

      ISO 1600 Shutter 1/160 Aperture F2.8

      When to use High or LOW ISO in Photography?

      As a professional photographer, there are certain situations where using a high ISO may be necessary.

      Low Light Situations: When shooting in low light conditions such as at night, indoors, or in a dimly lit room, a high ISO can be used to increase the sensitivity of the camera’s image sensor and allow for a faster shutter speed or a wider aperture. This will help to prevent blur from camera shake or subject movement, and also help to produce a well-exposed image. At the same time when ur shooting a Day Light Condition, u have to use lower ISO values and faster shutter speed to properly expose the image and avoid over esposure.

      ISO 100 shutter 1/125 Aperture: F5.6

      Action and Sports Photography: High-speed action and sports photography require fast shutter speeds in order to freeze the motion of the subject. In low light conditions, using a high ISO can help to achieve a faster shutter speed without underexposing the image. But, at the same time as in the above image, if ur shooting in daylight conditions u have to use both low ISO and faster shutter speed to get the result as above, u can see,

      ISO 400 Shutter 1/100 Aperture F1.8

      Street Photography: Street photography often requires the photographer to work quickly and without flash. Depending upon available light, u have to adjust the ISO, if ur in daylight conditions recommended to use LOW and if ur in an uncontrolled or low light situation u can use High ISO can be used to capture candid moments without the need for flash and without the subject noticing.

      Documentary and Photojournalism: In documentary and photojournalism, the goal is often to capture real-life moments as they happen. High ISO can be used to capture these moments even in low light conditions, without the need for flash or additional lighting.

      No flash allowed: Some situations like concerts, religious ceremonies, or museums have restrictions on the use of flash. High ISO can be used to capture images in these situations without the need for flash.

      It’s important to keep in mind that using a high ISO also increases the amount of noise in the image. However, modern cameras have advanced noise reduction technology that can help to minimize this effect, and post-processing software can also be used to further reduce noise.

      A good rule of thumb is to use the lowest ISO possible while still achieving the desired level of exposure. However, in certain situations, using a high ISO may be necessary in order to capture the desired shot.

      TIPS for shooting in LOW-Light (without raising ISO)

      When shooting in low light conditions, a photographer may be tempted to use a high ISO in order to achieve a faster shutter speed or a wider aperture. However, using a high ISO also increases the amount of noise in the image. Therefore, a photographer should consider other options to maintain a lower ISO while still achieving the desired level of exposure.

      1. Use a tripod: A steady camera is important when shooting in low light conditions. Using a tripod will help to prevent blur from camera shake, allowing the photographer to use a slower shutter speed while still keeping the image sharp.
      2. Use a wider aperture: A wider aperture will allow more light into the camera and can help to achieve a faster shutter speed or a lower ISO. This is especially useful for portraits and other images where a shallow depth of field is desired.
      3. Use a flash: Flash can provide additional light to the scene and help to achieve the desired level of exposure. However, it’s important to use flash carefully to avoid over-exposure or harsh shadows.
      4. Slow down your shutter speed: A slower shutter speed can be used to allow more light into the camera and help to achieve the desired level of exposure. This can create a sense of movement or blur in the image, depending on the subject.
      5. Use manual focus: In low light, the camera’s autofocus system may struggle to focus on the subject. Switching to manual focus can help to ensure that the subject is in focus.
      6. Use a reflector: Reflectors can be used to bounce light back onto the subject and help to achieve the desired level of exposure.
      7. Use image stabilization: Some lenses have image stabilization which can help to reduce blur caused by camera shake.

      What is DUAL NATIVE ISO?

      Dual Native ISO technology is a unique way for cameras to extend their dynamic range and reduce noise in low-light situations. It is a feature that can be found in certain Professional cinema cameras, including some consumer-level Mirrorless cameras too, like Panasonic S5 mark II and Sony FX30. Now, let’s consider a Pansonic Camera sensor that has two native ISO settings, 800 and 5000, which allows for increased flexibility in capturing a variety of lighting conditions.

      The implementation of two dedicated analog circuits on each pixel of the sensor allows for two native ISO settings, 800 and 5000. These circuits act as individual native ISOs before gain processing. This means that the sensor can read two different ISO values on the sensor instead of one, providing more flexibility in capturing a variety of lighting conditions.

      The first analog circuit is optimized for low-light situations, where the sensor’s native ISO is set at 800. The second analog circuit is optimized for high-light situations, where the sensor’s native ISO is set at 5000. This allows the camera to achieve a much higher sensitivity without introducing noise, which is typically introduced in the gain process of rating ISO in digital cameras.

      The two analog circuits work in tandem to provide a more efficient way of capturing light and reduces noise by processing the light in a specific way. The analog circuits are responsible for the camera’s ability to capture low-light footage with rich colorimetry and depth-of-field even in dark environments.

      The Dual Native ISO technology allows for more efficient video production, as it eliminates the need for additional lighting and can extend magic hour shooting. This feature also helps to achieve cinematic footage in low-light situations and allows for capturing footage with rich colorimetry and depth-of-field even in dark environments. This is particularly useful for run and gun documentary shoots, low-budget indie films, and broadcast studios, where lighting setups can be time-consuming and expensive.

    • What is the Aperture in Photography ?

      What is the Aperture in Photography ?

      In photography, the aperture is the opening in a camera lens that controls the amount of light that enters the camera. It is measured in f-stops, with a lower f-stop number indicating a larger aperture (more light) and a higher f-stop number indicating a smaller aperture (less light). The aperture also affects the depth of field in an image, with a larger aperture (smaller f-stop number) creating a shallow depth of field and a smaller aperture (larger f-stop number) creating a deeper depth of field. The aperture is one of the three elements in the exposure triangle, the other two being shutter speed and ISO. Together, these three elements determine the overall exposure of a photograph.

      Table of Contents

        Where is the Aperture ? in the Lens or in Camera?

        if aperture inside our camera or lens? of a Mirrorless camera, Yes, the aperture is a physical component of a camera lens, including mirrorless camera lenses. The aperture is typically made up of a series of metal blades that can be adjusted to change the size of the aperture opening. When you change the aperture setting on your camera, you are adjusting the position of these blades to let more or less light into the lens. In a mirrorless camera, the aperture is controlled by the camera body and it can be adjusted through the camera’s controls or through the lens itself if it has aperture rings. It is important to note that the aperture value is also expressed as a ratio, such as f/1.8 or f/5.6, with the number after the “f/” representing the aperture value.

        Does aperture determine lens quality?

        It’s true that better lenses tend to have wider apertures. A lens with a wide aperture (low f-stop number) can allow more light to enter the camera, which can be beneficial in low-light conditions and can also produce a shallow depth of field. However, having a wider aperture doesn’t necessarily make a lens “better”. A wide aperture lens will have more elements inside the lens, which can introduce more distortion and aberrations, which can affect image quality. Additionally, a wide aperture lens will also be larger and heavier, which can be less convenient for some photographers.

        A “better” lens is one that can produce high-quality images consistently across a wide range of situations, and that takes into account many factors such as sharpness, distortion, chromatic aberrations, and vignetting. A lens that has a wide aperture is just one of the characteristics that can contribute to a “better” lens, but it is not the only one.

        What is F-Stop in Aperture?

        An aperture stop, also known as an aperture diaphragm, is a device found in a camera lens that controls the amount of light that enters the camera. It works by adjusting the size of the aperture, which is the opening in the lens that allows light to pass through. The aperture is measured in f-stops, and the aperture stop is the mechanism that controls the f-stop.

        The aperture stop is typically a set of metal blades that can be adjusted to change the size of the aperture. As the aperture is made smaller (by adjusting the aperture stop to a higher f-stop number), less light is able to enter the camera. Conversely, as the aperture is made larger (by adjusting the aperture stop to a lower f-stop number), more light is able to enter the camera.

        The aperture stop also affects the depth of field in a photograph. A smaller aperture (higher f-stop number) will result in a greater depth of field, meaning that more of the image will be in focus. A larger aperture (lower f-stop number) will result in a shallower depth of field, meaning that less of the image will be in focus.

        Exposure and Aperture

        Aperture and exposure are closely related, as aperture controls the amount of light that enters the camera and exposure refers to the amount of light captured by the camera’s sensor.

        Aperture size is measured in f-stops, and is inversely proportional to the amount of light that enters the camera: the larger the aperture (smaller f-stop number), the more light that enters the camera; the smaller the aperture (larger f-stop number), the less light that enters the camera.

        When you increase the aperture size, you decrease the f-stop number, which increases the amount of light that enters the camera. This will also decrease the depth of field (the area of the image that appears in focus). When you decrease the aperture size, you increase the f-stop number, which decreases the amount of light that enters the camera. This will also increase the depth of field.

        Exposure is controlled by adjusting the aperture in conjunction with the shutter speed and ISO. Aperture controls the amount of light that enters the camera, while shutter speed controls the duration of time that the sensor is exposed to light, and ISO controls the sensitivity of the sensor. By adjusting these three settings, you can achieve the correct exposure for a given scene.

        In short, aperture controls the amount of light entering the camera, and affects the depth of field, while exposure is the total amount of light captured by the camera sensor, controlled by adjusting aperture, shutter speed and ISO.

        two different photos of some purple flowers shot with different apertures, the left with an aperture of f/2 and the right with an aperture of f/22

        Aperture and Depth of Field

        The aperture, or f-stop, controls the amount of light that enters a camera’s lens. It also controls the depth of field, which is the area of an image that is in sharp focus. A smaller aperture (larger f-stop number) results in a larger depth of field, while a larger aperture (smaller f-stop number) results in a shallower depth of field. This is because a smaller aperture allows less light to enter the camera, which requires a slower shutter speed and a greater depth of field to compensate. A larger aperture allows more light to enter the camera, which can be used with a faster shutter speed and a shallower depth of field to achieve a specific effect in the photograph.

        Bokeh vs Depth of Field – Are both Same or Different?

        Bokeh and depth of field are related, but they are not the same. Depth of field (DOF) is the distance between the nearest and farthest objects in a photograph that appear to be in focus. A large depth of field means that more of the image is in focus, while a shallow depth of field means that less of the image is in focus.

        Bokeh, on the other hand, refers to the aesthetic quality of the out-of-focus areas in a photograph. Bokeh is often used to describe the pleasing, soft look of the out-of-focus areas in a photograph, particularly in portraits and other types of photographs where the subject is in sharp focus and the background is blurred.

        A shallow depth of field can create a more pronounced bokeh effect in the out-of-focus areas of the image, but bokeh is not the same thing as depth of field. Depth of field is a measure of how much of an image is in focus, while bokeh is a measure of the aesthetic quality of the out-of-focus areas in an image.

        f-stop is the ratio of lens’s focal length to the aperture diameter, while f-number is the number that indicates aperture setting on the camera.

        Difference between F-Stop and F-Number?

        F-stop and f-number are terms that are often used interchangeably when referring to the aperture of a camera lens. The aperture is the adjustable opening in a camera lens that controls the amount of light that reaches the camera’s sensor.

        An F-stop is a measurement of the aperture’s size. It is the ratio of the lens’s focal length to the diameter of the aperture. For example, an F-stop of f/8 means that the aperture is one-eighth the size of the lens’s focal length.

        F-number is the number that is written on the aperture setting on the camera, it is the ratio of the lens’s focal length to the aperture diameter. The f-number is used to indicate the aperture setting on a camera, and it tells you how much light is being let in. The lower the f-number, the wider the aperture, and the more light that is allowed to enter the camera. The higher the f-number, the narrower the aperture and less light enters the camera.

        What is Max (Large) Aperture or Min (Small) Aperture

        Max aperture or Large Aperture refers to the largest aperture that a lens can open to. For example, if a lens has a max aperture of f/1.4, it means that the lens can open as wide as f/1.4, allowing for a lot of light to pass through. This is useful for low-light photography or for creating a shallow depth of field (where the subject is in focus but the background is blurred).

        Min aperture or Smaller Aperture, also known as the smallest aperture or the lens’s “stop down” limit, refers to the smallest aperture that a lens can close to. For example, if a lens has a min aperture of f/22, it means that the lens can close down as small as f/22, which allows for a greater depth of field (more of the image will be in focus). This is useful for landscape photography or other situations where you want more of the image in focus.

        For example, A lens with a aperture range of f/1.4 – f/16 have max aperture of f/1.4 and min aperture of f/16.

        How Aperture and Shutter Speed Connected to Each Other ?

        When taking a photograph, the aperture and shutter speed are used together to control the exposure of the image. A larger aperture and faster shutter speed will result in a brighter image, while a smaller aperture and slower shutter speed will result in a darker image. Photographers will often adjust these settings depending on the lighting conditions and the desired effect they want to achieve in the final image.

        For example, If you are taking a photo in low light, you might use a large aperture (e.g. f/1.4) to allow more light to enter the camera and a slower shutter speed (e.g. 1/30th of a second) to ensure that enough light reaches the sensor. On the other hand, if you are taking a photo of a fast-moving object, you might use a smaller aperture (e.g. f/16) to increase the depth of field and a faster shutter speed (e.g. 1/1000th of a second) to freeze the motion of the object.

        How Aperture and ISO Speed are connected to each other ?

        Aperture and ISO speed are both important factors in photography that work together to control the exposure of an image.

        Aperture, as discussed earlier, controls the size of the opening in the lens that allows light to pass through. It is measured in f-stop numbers and it also affects the depth of field in an image. A larger aperture (e.g. f/1.4) allows more light to enter the camera, while a smaller aperture (e.g. f/22) allows less light to enter the camera.

        ISO speed, on the other hand, controls the sensitivity of the camera’s sensor to light. A higher ISO speed (e.g. ISO 3200) means that the sensor is more sensitive to light and requires less light to make an exposure, while a lower ISO speed (e.g. ISO 100) means that the sensor is less sensitive to light and requires more light to make an exposure.

        When taking a photograph, aperture and ISO speed are used together to control the exposure of the image. A larger aperture and a lower ISO speed will result in a brighter image, while a smaller aperture and a higher ISO speed will result in a darker image.

        For example, if you are taking a photo in low light, you might use a large aperture (e.g. f/1.4) to allow more light to enter the camera and a high ISO speed (e.g. ISO 3200) to increase the sensitivity of the sensor to the available light. This way, you can maintain a fast shutter speed to prevent motion blur. On the other hand, if you are taking a photo in bright light, you might use a smaller aperture (e.g. f/16) to increase the depth of field and a lower ISO speed (e.g. ISO 100) to decrease the sensitivity of the sensor. This way you can use a slower shutter speed without overexposing the image.

        How to Set Aperture on Canon, Nikon, and Sony Cameras?

        The process for setting the aperture on a Canon, Nikon, and Sony camera may vary slightly depending on the specific model of camera, but in general, the process is similar. Below are the general steps for setting the aperture on each brand of camera:

        Locate the aperture control on the camera. On most Canon cameras, the aperture control is a dial on the top of the camera, typically labeled with

        Canon – “AV” for aperture priority mode.

        Nikon – “A” for aperture priority mode.

        Sony – “A” for aperture priority mode.

        Turn the aperture control dial to set the desired aperture. The aperture will be displayed on the camera’s LCD screen or in the viewfinder.

        It’s important to note that some cameras have a button which needs to be pressed while turning the control dial to adjust the aperture. Always refer to the camera manual to ensure the correct process.

        In all the above steps, you can also adjust the aperture using the camera’s menu or by using the camera’s control wheel if your camera has one.

        Once you have set the aperture, you should adjust the shutter speed or ISO to achieve the correct exposure for your image. It’s important to practice and experiment with different aperture, shutter speed, and ISO settings to get a feel for how they work together and to understand the effect they have on your images.

        Different photography situations may require different aperture settings to achieve the desired results. Below are some common photography situations and recommended aperture settings:

        1. Portrait photography: In portrait photography, a shallow depth of field is often desired to create a sense of separation between the subject and the background. A large aperture (e.g. f/1.4, f/2) is recommended to achieve this effect.
        2. Landscape photography: In landscape photography, a greater depth of field is often desired to keep more of the image in focus. A small aperture (e.g. f/16, f/22) is recommended to achieve this effect.
        3. Low-light photography: In low-light photography, a large aperture is often desired to allow more light to enter the camera. A large aperture (e.g. f/1.4, f/2) is recommended to achieve this effect.
        4. Sports and action photography: In sports and action photography, a fast shutter speed is often desired to freeze the motion of the subject. A larger aperture (e.g. f/2.8, f/4) is recommended to achieve this effect.
        5. Macro photography: In macro photography, a small aperture is often desired to increase the depth of field and keep more of the subject in focus. A small aperture (e.g. f/16, f/22) is recommended to achieve this effect.
        6. Astrophotography: In Astrophotography, a small aperture is often desired to have more stars in focus. A small aperture (e.g. f/4, f/5.6) is recommended to achieve this effect.

        Aperture relation with Diffraction of Lens

        Diffraction is an optical effect that occurs when light passes through a small aperture, such as the aperture of a camera lens. As the aperture becomes smaller, the light passing through it begins to spread out, causing the edges of the image to become softer and less defined. This effect is known as diffraction and it can have a negative impact on the overall sharpness and quality of the image.

        Aperture and diffraction have an inverse relationship, which means that as the aperture becomes smaller, the effect of diffraction becomes greater. Lenses with a larger aperture (e.g. f/1.4, f/2) will have less diffraction than lenses with a smaller aperture (e.g. f/16, f/22). This is because the larger aperture allows more light to enter the lens and reduces the amount of spreading that occurs as the light passes through the aperture.

        The relationship between aperture and diffraction is important to understand when taking photographs, especially when working with small apertures. While a smaller aperture may be desirable for certain types of photography, such as landscape or macro photography, it can also result in the loss of sharpness and definition due to diffraction. To minimize the effect of diffraction, it is generally recommended to use the largest aperture possible while still achieving the desired depth of field.

        It’s important to note that, the effect of diffraction also depend on the physical characteristics of lens design and the sensor resolution of the camera. Some lenses have better performance at smaller apertures, and high resolution sensors can also help in reducing the effect of diffraction.

        How aperture controls lens aberrations?

        Aperture controls lens aberrations by adjusting the amount of light that enters the lens and by adjusting the depth of field in an image. By adjsuting the aperture, photographers can improve the sharpness and clarity of their images by reducing lens aberrations.

        By controlling the amount of light that enters the lens, aperture can help to reduce certain types of lens aberrations. For example, by decreasing the amount of light that enters the lens, aperture can help to reduce chromatic aberration, which occurs when different colors of light are focused at different points, resulting in a colored fringe around the edges of an object.

        Second, aperture controls the depth of field in an image by adjusting the size of the aperture. The depth of field is the area in focus in an image, and it can be made larger or smaller by adjusting the aperture size. As the aperture size increases, the depth of field decreases, which can make it difficult to keep both the foreground and background in focus. This is the reason why a large aperture leads to a shallow depth of field and a small aperture leads to a deep depth of field.

        How to Calculate the Sweet Spot of Any Lens?

        The “sweet spot” of a lens aperture refers to the aperture setting at which the lens is able to produce the sharpest and most detailed images. It is the aperture at which the lens performs optimally, minimizing both the effects of diffraction and lens aberrations.

        To calculate the sweet spot of a lens, you can perform a lens test. This can be done by taking a series of photos of a test chart or other high-contrast subject at different aperture settings and then examining the images to determine which aperture produced the sharpest results.

        One of the most common ways to do this is to take a series of images starting at the lens’s maximum aperture and then stopping down one stop (f/1.4, f/2, f/2.8, etc.) at a time until you reach the lens’s minimum aperture. Then, you can examine the images at 100% magnification in your image editing software and compare the sharpness and detail in the images. The aperture setting at which the image appears to be the sharpest is likely the sweet spot of the lens.

        It is worth noting that, the sweet spot aperture can vary depending on the lens and the situation, for example, some lenses have better performance at smaller apertures and other have better performance at larger aperture.

        • The sweet spot of a Canon 50mm f/1.8 lens is at f/5.6 or f/8 aperture.
        • The Sony 16-50mm kit zoom lens, the sweet spot varies with Zoom since its a variable aperture zoom lens. as you zoom in or out, the sweet spot can change. At the wide end (16mm), the sweet spot may be found at a larger aperture such as f/5.6 and at the telephoto end (50mm) it may be found at a smaller aperture such as f/11.
        • Tamron 17-70mm f/2.8 lens, the sweet spot is often found around the f/8 aperture.
        • Sigma 56mm f/1.4 lens, the sweet spot is at f/5.6

        Aperture – Conclusion

        Aperture is a fundamental aspect of photography that controls the amount of light that enters the lens and also affects the depth of field in an image. It is the adjustable opening in the lens that can be made larger or smaller to allow more or less light to enter the lens. Aperture is measured in f-stops and is often represented by a number such as f/1.4 or f/16. The aperture setting can be changed to control the amount of light that enters the lens, which in turn affects the exposure of the image.

        One of the most important characteristics of aperture is its ability to control depth of field. Aperture controls the depth of field by adjusting the size of the aperture. A larger aperture (smaller f-stop number) creates a shallow depth of field, which means that less of the image is in focus, while a smaller aperture (larger f-stop number) creates a deeper depth of field, which means that more of the image is in focus. This is why a large aperture is often used to create a shallow depth of field and a pleasing bokeh effect to emphasize the subject and de-emphasize the background, and a small aperture is used for landscape photography to have a deep depth of field.

        Aperture also affects other types of lens aberrations such as spherical aberration and chromatic aberration. Spherical aberration occurs when light passing through the edges of a lens focuses at a different point than light passing through the center, aperture can help to reduce spherical aberration by allowing less light to pass through the edges of the lens. Chromatic aberration is caused by the lens being unable to focus all colors to the same point. Aperture can help to reduce chromatic aberration by decreasing the amount of light that enters the lens and by using a smaller aperture to increase the depth of field.

        If we summarize everything then, Aperture is an adjustable opening in the lens that controls the amount of light that enters the lens, and it is measured in f-stops. Aperture controls the depth of field and helps to reduce lens aberrations such as spherical aberration and chromatic aberration. Aperture is a fundamental aspect of photography, and it plays a crucial role in achieving the desired effect in an image.

      • What is Shutter Speed in Mirrorless Camera

        What is Shutter Speed in Mirrorless Camera

        the shutter is an essential part of any camera as it controls the amount of light that enters the camera and reaches the sensor, which ultimately determines the exposure, motion, and overall image quality of a photograph. It is one of the three pillars of the exposure triangle along with aperture and ISO, and mastering the use of shutter speed is a key aspect of becoming a skilled photographer.

        A fast shutter speed, such as 1/1000th of a second, will freeze fast-moving action and reduce motion blur in the image. This is useful in sports or wildlife photography where the subject is moving quickly. A slow shutter speed, such as 1/30th of a second, will create a sense of motion and blur in the image. This can be used to convey a sense of movement or to create a creative effect in a photo.

        Types of Shutters in Mirrorless Cameras

        There are two types of shutters in a mirrorless camera: electronic and mechanical.

        1. Electronic Shutter: An electronic shutter uses the camera’s sensor to capture light and create an image. It works by turning on and off the sensor’s light-sensitive pixels to control the amount of light entering the camera. Electronic shutters are generally faster and more precise, allowing for faster shutter speeds and more control over the amount of light entering the camera. They are also quiet, making them ideal for situations where silence is required.
        2. Mechanical Shutter: A mechanical shutter is a physical barrier that opens and closes to control the amount of light entering the camera. It works in a similar way to the shutters in film cameras, and it can be useful in certain situations such as low light or fast action photography. However, mechanical shutters can be less precise and can produce a little bit of noise.

        A key advantage of electronic shutters is that they allow for much faster maximum shutter speeds, in some cases, up to 1/32000 sec, which can be useful in situations where you need to freeze fast-moving action. They also allow for silent shooting, which is useful in situations where noise would be disruptive, such as during a wedding ceremony.

        However, electronic shutters can produce some unwanted artifacts such as rolling shutter effects, which can happen when you shoot moving subjects or panning shots. This is caused by the way that the sensor reads the image and can result in distortion or skewing of the image. To avoid this, you can use a mechanical shutter or use a faster shutter speed.

        In general, mirrorless cameras allow you to choose between electronic and mechanical shutters depending on the shooting situation and the photographer’s preference, but electronic shutter are widely used in mirrorless cameras.

        It’s worth noting that electronic shutters can produce some unwanted artifacts such as rolling shutter effects, which can happen when you shoot moving subjects or panning shots. This is caused by the way that the sensor reads the image and can result in distortion or skewing of the image. To avoid this, you can use a mechanical shutter or use a faster shutter speed.

        How Shutter Speed is measured in Camera ?

        Shutter speed is measured in a camera in seconds or fractions of a second. The most common shutter speeds are measured in fractions of a second, such as 1/1000, 1/500, 1/250, and so on.

        A faster shutter speed, such as 1/1000th of a second, is used to freeze fast-moving action and reduce motion blur in the image. This is useful in sports or wildlife photography where the subject is moving quickly. A slower shutter speed, such as 1/30th of a second, is used to create a sense of motion and blur in the image. This can be used to convey a sense of movement or to create a creative effect in a photo.

        Shutter speeds slower than a second are indicated by a “s” (for seconds) after the number, for example, 2s, 4s, 8s, etc.

        In manual mode, the camera allows you to select the shutter speed, aperture and ISO to get the correct exposure. In Shutter Priority mode, you can select the shutter speed, and the camera will automatically adjust the aperture to achieve the correct exposure. In fully automatic mode, the camera will choose the shutter speed, aperture and ISO for you.

        Some cameras also have Bulb mode, which allows the shutter to remain open for as long as the photographer holds down the shutter button. This mode is useful for long exposures, such as night photography or light painting.

        In summary, the shutter speed is measured in a camera in seconds or fractions of a second, and it controls the amount of time that the sensor is exposed to light when taking a photo. The photographer can use the shutter speed to control the motion and exposure in a photograph, and it is one of the three pillars of the exposure triangle along with aperture and ISO.

        How Exposure and Shutter Speed Closely Connected

        Exposure is the amount of light that is captured by the camera, and it is determined by the aperture, shutter speed, and ISO. A longer exposure time will allow more light to reach the sensor, resulting in a brighter image. A shorter exposure time will allow less light to reach the sensor, resulting in a darker image.

        The aperture controls the amount of light that enters the camera through the lens, and it is measured in f-stops. The smaller the aperture (larger f-stop number), the less light that enters the camera, and the darker the image will be. The larger the aperture (smaller f-stop number), the more light that enters the camera, and the brighter the image will be.

        The ISO controls the sensitivity of the camera’s sensor to light. The lower the ISO, the less sensitive the sensor is to light, and the darker the image will be. The higher the ISO, the more sensitive the sensor is to light, and the brighter the image will be.

        Therefore, when adjusting the shutter speed, it’s essential to consider the aperture and ISO as well in order to achieve the desired exposure. For example, if you want to freeze fast-moving action with a fast shutter speed, you’ll need to open the aperture or increase the ISO to allow more light in, to compensate for the shorter exposure time.

        shutter speed and exposure are closely connected to each other because the shutter speed controls the amount of time that the sensor is exposed to light, which ultimately determines the exposure of the image. To achieve the desired exposure, it’s essential to consider the aperture and ISO as well.

        Electronic shutter vs Mechnical shutter

        The choice between an electronic and mechanical shutters in a mirrorless camera depends on the specific shooting situation and the photographer’s preference. Both have their own advantages and disadvantages.

        Advantages of electronic shutter:

        • Faster maximum shutter speeds, in some cases, up to 1/32000 sec, which can be useful in situations where you need to freeze fast-moving action.
        • Silent shooting is useful in situations where noise would be disruptive, such as during a wedding ceremony.
        • More precise and accurate, which results in sharper and clearer images.
        • Can be less affected by mechanical issues that can happen in mechanical shutters.

        Advantages of mechanical shutter:

        • More reliable in low-light situations and high-speed action photography as it does not have the rolling shutter effect.
        • No distortion from the rolling shutter effect, which can happen when shooting fast-moving subjects or panning shots with the electronic shutter.
        • The more natural feeling of taking a photo as it physically opens and closes.
        • More robust and less prone to wear and tear than electronic shutters.

        In general, electronic shutters are more versatile and can be used in a wider range of situations, while mechanical shutters are more reliable and robust. Ultimately, the choice between electronic and mechanical shutters in a mirrorless camera will depend on the specific needs of the photographer and the shooting situation.

        What is Shutter Stop?

        A “shutter stop” is a term that refers to a change in the shutter speed that results in a halving or doubling of the amount of light entering the camera. It is also known as “stop” or “EV stop.”

        The term “stop” is used because it refers to a change in the aperture or shutter speed that results in a change in the exposure value (EV) of the image. The exposure value is a measure of the amount of light that enters the camera, and it is determined by the aperture, shutter speed, and ISO. Each “stop” in the aperture or shutter speed represents a doubling or halving of the amount of light that enters the camera, which affects the exposure of the image.

        For example, if you change the shutter speed from 1/100th of a second to 1/50th of a second, you will double the amount of light entering the camera, which is equivalent to one “stop” of light. Similarly, if you change the shutter speed from 1/100th of a second to 1/200th of a second, you will halve the amount of light entering the camera, which is equivalent to one “stop” of light.

        In photography, adjusting the shutter speed by one stop will either double or halve the amount of light that enters the camera, resulting in a corresponding increase or decrease in the exposure of the image. This will affect the brightness of the image and can be used to achieve the desired level of exposure in a photograph.

        Conclusion “shutter stop” is a term that refers to a change in the shutter speed that results in a halving or doubling of the amount of light entering the camera. It is used in photography to adjust the exposure of an image by either doubling or halving the amount of light that enters the camera.

        How to set up the shutter speeds in Canon, Nikon and Sony Cameras ?

        setting the shutter speed on Sony, Canon, and Nikon cameras can be done by turning the camera on and setting it to manual or shutter priority mode, then locate the shutter speed dial on the top of the camera or on the back of the camera, and turn the dial to the desired shutter speed. The options will be displayed on the camera’s LCD screen. Some cameras also have the option to change the shutter speed using the camera’s menu, or buttons and dials, and the process may vary depending on the specific camera model.

        How to Avoid Rolling Shutter?

        Rolling shutter effect is an artifact that can occur when using an electronic shutter in a mirrorless camera. It is caused by the way that the sensor reads the image, and it can result in distortion or skewing of the image. The rolling shutter effect is more pronounced when the camera is panned or when the subject is moving quickly. Here are a few ways to minimize the rolling shutter effect in a mirrorless camera:

        1. Use a mechanical shutter: If you are using a camera that has both electronic and mechanical shutters, switching to a mechanical shutter can also help to minimize the rolling shutter effect. Mechanical shutters are less prone to this artifact as they physically open and close, and the sensor captures the image all at once.
        2. Avoid panning and fast movement: Avoiding panning and fast movement is another way to minimize the rolling shutter effect. When shooting with an electronic shutter, try to keep the camera still, and avoid fast movement of the camera or the subject.

        What is 2x shutter rule in Photography ?

        The 2x shutter rule is a guideline used in photography to determine the minimum shutter speed that should be used to freeze motion and avoid camera shake. It states that the minimum shutter speed to be used should be the reciprocal of the focal length of the lens being used.

        For example, if you are using a 50mm lens, the minimum shutter speed should be 1/50th of a second. If you are using a 100mm lens, the minimum shutter speed should be 1/100th of a second.

        It’s important to note that the 2x shutter rule is a general guideline and it’s not an absolute rule. Factors such as the size of the camera, the presence of image stabilization, and the photographer’s own steady hand can affect the necessary shutter speed. Additionally, the rule is referred to as the 2x rule because it’s based on the idea that the camera shake will be double that of the focal length of the lens, but this can vary depending on the specific camera and lens.

        The 2x shutter rule is particularly useful when working with a long lens. Long lenses magnify the image but also magnify any camera shake, which can make it difficult to get a sharp image. Using a shutter speed that is at least twice the reciprocal of the focal length will help to ensure that the image is sharp, even if the photographer’s hand is not completely steady. The 2x shutter rule is a guideline that states that the minimum shutter speed to be used should be the reciprocal of the focal length of the lens being used.

        When using image stabilization, the photographer can use slower shutter speeds than would be possible without image stabilization, since the IS compensates for camera shake. This allows the photographer to capture images with lower light, but still maintain a sharp image. For example, with IS, a photographer can use a shutter speed of 1/30th of a second instead of the usual 1/60th of a second, which is recommended by the 2x shutter rule.

        For shutter speed, the recommended setting will depend on the frame rate and the desired effect. For example, when shooting at 24fps or 30fps, it’s recommended to use a shutter speed that is double the frame rate. This means a shutter speed of 1/48th of a second or 1/60th of a second respectively. This will help to ensure that the motion in the video looks natural and that the images are sharp.

        When shooting at higher frame rates such as 60fps or 120fps, the recommended shutter speed will be faster. For example, when shooting at 60fps, the recommended shutter speed is 1/120th of a second. This will help to freeze the motion and produce a sharper image.

        It’s worth noting that the recommended shutter speeds are just guidelines, and the desired effect or the specific shooting situation may require different settings. For example, when shooting in low light conditions, a slower shutter speed may be required to allow more light to reach the sensor, even if it results in some motion blur.

      • What is a Mirrorless Camera ?

        What is a Mirrorless Camera ?

        A mirrorless camera is a type of digital camera that does not have a mirror or prism mechanism to direct light to the viewfinder. Instead, mirrorless cameras rely on an electronic viewfinder (EVF) or the camera’s rear LCD screen to compose the image.

        One of the main advantages of mirrorless cameras is their compact size and lightweight design, making them more portable than traditional DSLR cameras. They also offer fast autofocus, high image quality, and the ability to use interchangeable lenses, similar to a DSLR camera.

        Another advantage of mirrorless cameras is their ability to preview the exposure, white balance, and depth of field in real time on the electronic viewfinder or rear LCD screen, which allows for more accurate composition and exposure.

        In terms of technology, mirrorless cameras use a different autofocus system than DSLR cameras, mirrorless cameras use a contrast-detection autofocus system that works by analyzing the image data from the sensor to determine the correct focus. This system is generally considered to be more accurate and faster than the phase-detection system used in DSLR cameras.

        Overall, mirrorless cameras are a great choice for photographers who want the flexibility and control of a DSLR camera in a more compact and lightweight package.

        Mirrorless – The Basic Ingredients

        A mirrorless camera is constructed with several key components that work together to capture and process images. Here are the major components of a mirrorless camera and their functions:

        1. Image sensor: The image sensor is the electronic component that captures the light and converts it into an image. Mirrorless cameras typically have smaller sensors than DSLRs, but they still offer high image quality. The image sensor is made up of millions of small light-sensitive diodes called pixels, which convert the light into electrical signals that can be processed and stored as an image.
        2. Processor: The processor is the electronic component that processes the image data and makes it ready for storage or display. The processor is responsible for tasks such as noise reduction, color correction, and image stabilization. It also manages the camera’s settings and controls, and communicates with the other components of the camera.
        3. Autofocus system: Mirrorless cameras use a contrast-detection autofocus system, which works by analyzing the image data from the sensor to determine the correct focus. This system is generally considered to be more accurate and faster than the phase-detection system used in DSLRs.
        4. Interchangeable lens mount: Mirrorless cameras use an interchangeable lens mount, which allows the user to change the lens as per their requirement. This makes them very versatile, as different lenses can be used for different types of photography.
        5. Electronic Viewfinder (EVF) or LCD screen: An EVF allows the user to preview the exposure, white balance, and depth of field in real-time, while the LCD screen is used for composing images and reviewing them.
        6. Shutter button and control dials: The shutter button is used to take the picture, while the control dials are used to adjust settings such as aperture, shutter speed, and ISO.
        7. Battery and memory card slot: The battery provides power to the camera, while the memory card slot is used to store the captured images.
        8. Communication and Connectivity: Many mirrorless cameras have built-in Wi-Fi, Bluetooth, and USB connectivity, which allows the user to transfer images and videos

        DSLR vs Mirrorless

        Mirrorless cameras have some advantages over DSLR cameras, here are a few reasons why they are considered better by some photographers:

        • Compact and lightweight design: Mirrorless cameras tend to be smaller and lighter than DSLRs, making them more portable and convenient to carry around.
        • Advanced Autofocus system: Most mirrorless cameras use a contrast-detection autofocus system, which is considered more accurate and faster than the phase-detection system used in DSLRs. This makes mirrorless cameras particularly well-suited for capturing fast-moving subjects or for shooting in low-light conditions.
        • Electronic Viewfinder (EVF): An EVF allows you to preview the exposure, white balance, and depth of field in real-time. This can be a great advantage for photographers as it allows you to see the final image before you take the shot, which can help you achieve the desired result.
        • Silent Shutter: Mirrorless cameras have a silent or near-silent electronic shutter, which can be useful in situations where you don’t want to disturb the subject or the environment.
        • Video Capabilities: Mirrorless cameras have been geared towards videography and offer advanced video features such as high-resolution 4K recording and slow-motion recording, which is not common in DSLRs.

        Hybrid AutoFocus (Mirrorless) vs Phase Detect Auto Focus (DSLR)

        Hybrid autofocus is a type of autofocus system that combines both phase-detection and contrast-detection autofocus. It uses phase-detection autofocus to quickly determine the approximate distance to the subject, and then fine-tunes the focus using contrast-detection autofocus. This type of autofocus system is commonly found in mirrorless cameras, and it is considered to be fast and accurate.

        Phase-detection autofocus, on the other hand, uses a separate sensor to measure the phase difference between light that is reflected off the subject and the light that is projected by the camera. This information is then used to determine the distance to the subject and adjust the focus accordingly. This type of autofocus system is commonly found in DSLR cameras and it is considered to be fast but not as accurate as hybrid autofocus.

        In summary, hybrid autofocus combines the benefits of both phase-detection and contrast-detection autofocus, providing fast and accurate focusing, while phase-detection autofocus is faster but not as accurate. The choice of autofocus system depends on the specific camera and the user’s needs and preferences.

        How Mirrorless Cameras Work ?

        Mirrorless cameras work by capturing light through the lens and directing it to the image sensor, where it is converted into an image. The image sensor is a electronic component that captures the light and converts it into an image. The image sensor is typically smaller than the one used in DSLRs, but it still offers high image quality.

        The process of capturing an image in a mirrorless camera is as follows:

        1. Light enters the camera through the lens and is directed to the image sensor. The lens is mounted on the camera body and it can be interchangeable, this allows the user to choose different lens for different types of photography.
        2. The image sensor is a array of millions of photo-sensitive diodes called pixels, which are responsible for capturing the light. The image sensor captures the light and converts it into an electrical signal.
        3. The processor, which is another electronic component in the camera, processes the image data and makes it ready for storage or display. The processor is responsible for tasks such as noise reduction, color correction, and image stabilization.
        4. The autofocus system, which is also known as contrast-detection autofocus, analyzes the image data from the sensor to determine the correct focus. The autofocus system compares the brightness of pixels in the image, and adjust the lens position until it finds the highest level of contrast, which indicates that the image is in focus.
        5. The image is previewed on the electronic viewfinder (EVF) or the rear LCD screen, allowing the user to compose the image and make any necessary adjustments to the exposure, white balance, and other settings. The EVF uses a small display and optics to project the image sensor’s live view to the eye of the photographer, it also allows the photographer to see the live preview of the final image.
        6. When the user presses the shutter button, the image sensor captures the final image and stores it on the memory

        Mirrorless Trend – The Wrapup

        Canon and Nikon, like many other camera manufacturers, have been affected by the trend of photographers moving from DSLRs to mirrorless cameras. Both companies have responded to this trend by releasing a series of mirrorless cameras and investing in developing their mirrorless technology.

        Canon and Nikon have recently announced to shift their focus towards mirrorless camera production, and they have stopped making new models of DSLR cameras. They are still continuing to support their existing DSLR models with firmware updates and lens development.

        It is important to note that the decision to stop making new models of DSLR cameras does not mean that the companies will stop producing or supporting DSLR cameras altogether, but it indicates that the focus is shifting towards mirrorless cameras, which are becoming increasingly popular among photographers.

        As a consumer its now recommended that you should now invest your hard earned money on Mirrorless system cameras.

      • What is Exposure Triangle in photography? Explained

        What is Exposure Triangle in photography? Explained

        Exposure in photography refers to the amount of light that reaches the camera’s sensor when taking a picture. In a mirrorless camera, exposure is determined by three main settings: aperture, shutter speed, and ISO. Each of these settings affects the overall exposure of the image in different ways.

        What is an exposure Triangle?

        The exposure triangle is a fundamental concept in photography that refers to the relationship between aperture, shutter speed, and ISO, and how they work together to create a properly exposed image. These three elements are the primary building blocks of exposure, and understanding how they work together is essential for any photographer looking to take control of their camera and create the desired look and feel for their images.

        Aperture: Aperture is the opening in the lens that controls the amount of light that enters the camera. It is measured in f-stops, and the lower the f-stop number, the wider the aperture. A wide aperture (e.g., f/1.8) allows more light to enter the camera, while a narrow aperture (e.g., f/22) allows less light to enter. Aperture also controls depth of field, which is the amount of the image that is in focus. A wide aperture (e.g., f/1.8) creates a shallow depth of field, while a narrow aperture (e.g., f/22) creates a deep depth of field.

        Shutter Speed: Shutter speed is the amount of time that the camera’s shutter is open, measured in seconds or fractions of a second. A faster shutter speed (e.g., 1/1000th of a second) allows less light to enter the camera and freezes motion, while a slower shutter speed (e.g., 1 second) allows more light to enter the camera and can create motion blur.

        ISO: ISO is the camera’s sensitivity to light, measured in numbers (e.g., 100, 200, 400, etc.). A lower ISO (e.g., 100) is less sensitive to light and produces less noise, while a higher ISO (e.g., 800) is more sensitive to light and produces more noise.

        Together, aperture, shutter speed, and ISO work together to determine the overall exposure of an image. If one element of the exposure triangle is changed, it will affect the other two elements. For example, if the aperture is widened (e.g., f/1.8) to allow more light into the camera, the shutter speed will need to be faster or the ISO will need to be increased to compensate for the additional light.

        Achieving the correct exposure can be tricky, but with the understanding of the exposure triangle, one can make the necessary adjustments to get the desired result. For example, if you want to freeze a fast-moving subject, you would use a fast shutter speed. If you want to create a shallow depth of field, you would use a wide aperture. If you want to shoot in low light, you would use a high ISO.

        Conclusion, the exposure triangle is a fundamental concept in photography that refers to the relationship between aperture, shutter speed, and ISO. Aperture controls the amount of light that enters the camera and the depth of field, shutter speed controls the amount of time the shutter is open, and ISO controls the camera’s sensitivity to light. Together, these three elements work together to determine the overall exposure of an image. Understanding how they work and how to use them is essential for any photographer looking to take control of their camera and create the desired look and feel for their images.

        What is an aperture in Photography?

        Aperture in photography refers to the size of the opening in a camera’s lens through which light enters the camera. It is measured in f-stops, and the size of the aperture is inversely proportional to the f-stop number. For example, an aperture of f/2.8 is larger than an aperture of f/8.

        The aperture controls the amount of light that enters the camera, but it also controls the depth of field in a photograph. The aperture works in tandem with the shutter speed and ISO, which are the other two elements of the exposure triangle.

        A larger aperture (smaller f-stop number) allows more light into the camera and creates a shallow depth of field, where the subject is in sharp focus and the background is blurred. This is commonly used in portraits to isolate the subject and draw attention to it.

        On the other hand, a smaller aperture (larger f-stop number) allows less light into the camera and creates a deep depth of field, where the entire scene is in focus from the foreground to the background. This is commonly used in landscape photography to ensure that everything is in focus.

        The aperture setting is typically represented by an f-stop number (e.g. f/2.8, f/5.6, etc.). A lower f-stop number corresponds to a wider aperture, which allows more light into the camera. A higher f-stop number corresponds to a narrower aperture, which allows less light into the camera.

        What is a shutter speed in Photography?

        Shutter speed in photography refers to the amount of time that the camera’s sensor is exposed to light. It is measured in fractions of a second, such as 1/1000, 1/60, 1/30, etc.

        Shutter speed controls the amount of motion blur in a photograph. A fast shutter speed (e.g. 1/1000) will freeze fast-moving action, while a slower shutter speed (e.g. 1/60) will create motion blur. This can be used to create a sense of movement or to capture a moment in time.

        When using a slow shutter speed, a tripod or other form of camera stabilization is often necessary to prevent camera shake and resulting image blur.

        A faster shutter speed is typically used in situations with fast-moving subjects or low-light conditions, while a slower shutter speed is typically used in situations where you want to create a sense of motion or capture the movement in the scene.

        Shutter speed works in tandem with the aperture and ISO, which are the other two elements of the exposure triangle. Changing the shutter speed will affect the aperture and ISO settings and you need to adjust accordingly to get the desired exposure.

        What is an ISO in Photography?

        ISO in photography refers to the measure of a camera’s sensitivity to light. It is typically represented by a numerical value, such as ISO 100, ISO 200, ISO 400, etc.

        A lower ISO value (e.g. ISO 100) will produce less noise in the final image, but will require more light to achieve the correct exposure. A higher ISO value (e.g. ISO 800) will produce more noise but will allow for faster shutter speeds in low-light situations.

        ISO works in tandem with the aperture and shutter speed, which are the other two elements of the exposure triangle. Changing the ISO setting will affect the aperture and shutter speed settings, and you need to adjust accordingly to get the desired exposure.

        When you increase the ISO, your camera becomes more sensitive to light, so you can use a faster shutter speed or a smaller aperture to achieve the same exposure. This can be helpful in low-light situations, where a faster shutter speed or a smaller aperture may not be possible. However, increasing the ISO also increases the amount of noise in the image, which can be detrimental to image quality.

        ISO is one of the most important settings in photography and you should use it in conjunction with the other settings (aperture, shutter speed) to get the desired exposure and effect in your photograph.

        Recommendation for Exposures setting for beginner mirrorless users

        If you are a beginner mirrorless user, it’s important to start with the basic exposure settings and work your way up as you become more comfortable with the camera. Here are some general recommendations for exposure settings for beginner mirrorless users:

        1. Use aperture priority mode (A or Av on the mode dial): This mode allows you to set the aperture and the camera will automatically adjust the shutter speed to achieve the correct exposure. This is a good starting point for beginners as it gives you control over the depth of field, which is a key aspect of composition.
        2. Use ISO 100 or 200: Start with the lowest ISO setting possible, typically ISO 100 or 200. This will produce the least amount of noise in the image and will give you the best quality.
        3. Use the camera’s light meter: The camera’s light meter will help you determine the correct settings for the aperture, shutter speed, and ISO. Use the camera’s live view to check the exposure and make adjustments as needed.
        4. Use the histogram: The histogram is a visual representation of the tonal range of the image. It can help you to identify underexposed or overexposed areas of the image, and make adjustments accordingly.
        5. Take test shots: Take test shots at different settings and review the images on the camera’s display or on the computer. This will help you to identify any issues with the exposure and make adjustments as needed.
        6. Experiment with different lighting conditions: Experiment with different lighting conditions to understand how it affects the exposure.

        By following these tips, you should be able to set proper exposure on your mirrorless camera and create beautiful photographs. Remember that photography is an art, and it takes practice to master the technique, so be patient and keep experimenting.

        How to check mirrorless camera exposure on the histogram

        Checking the exposure on a mirrorless camera’s histogram involves analyzing the distribution of tonal values in the image. Here are the steps to check exposure on the histogram of a mirrorless camera:

        1. Take a photo: Take a photo with your mirrorless camera, making sure to keep the camera steady and use appropriate exposure settings.
        2. Review the image: Review the image on the camera’s display or on a computer.
        3. Access the histogram: Most mirrorless cameras have a histogram display feature, usually located in the playback or review mode. On some cameras, it can be accessed by pressing a dedicated button or through the menu options.
        4. Analyze the histogram: The histogram is a graph that displays the distribution of tonal values in the image from dark (left side) to light (right side). The height of the graph at any point represents the number of pixels at that particular tonal value.
        5. Check for clipping: On the histogram, if the graph is touching the right or left side of the display, it means that there is an overexposure or underexposure, this is called clipping.
        6. Make adjustments: If the histogram indicates that the image is overexposed or underexposed, make adjustments to the aperture, shutter speed, or ISO to achieve the desired exposure.
        7. Repeat the process: Take another photo and check the histogram again, repeat the process until you achieve the desired exposure.

        The histogram is a useful tool for checking the exposure of your images, it allows you to make adjustments before taking the final picture, and it’s a good practice to check the histogram after every picture, especially when working in challenging lighting conditions.

        Top 5 Mistakes beginners do while doing exposure setting in the camera

        1. Not using the correct shooting mode: Some beginners may use auto mode all the time, and not take advantage of the camera’s manual and semi-manual modes, like Aperture Priority, Shutter Priority, and Manual mode. These modes give you more control over the exposure and allow you to create the desired effect.
        2. Not understanding the relationship between aperture, shutter speed, and ISO: Beginners may not understand how these three settings work together to create the proper exposure, and as a result, they may not be able to achieve the desired effect.
        3. Not checking the histogram: Many beginners may not know how to read a histogram and may not be aware that it can indicate if the image is overexposed or underexposed.
        4. Not using a tripod: A tripod is essential for keeping the camera steady when shooting in low light or long exposures, beginners may not use a tripod and may end up with blurry or shaky images.
        5. Not adjusting the white balance: White balance is an essential setting that can affect the color temperature of the image. Beginners may not understand how to adjust the white balance and may end up with images that have a color cast.
        6. Not using flash correctly: Flash can be a powerful tool for adding light to a scene,